Friday, October 30, 2009

Din Tai Fung - Arcadia, CA

Jason, James and I met up last week for dinner. We first started out with plans for donkatsu, then kabobs and somehow ended up in Arcadia for dumplings. We went to the infamous Din Tai Fung. There are two locations in Arcadia, on the same street!! One on 1088 S. Baldwin Ave and a newer one on 1108 S. Baldwin Ave. The newer one is owned by the owner’s son and at 8 pm, there was quite a few parties waiting outside. Jason, who is a regular there, asked if the head chef was at this location today and he was. Apparently, the head chef rotates between this one and the other restaurant so be sure to check where he is before you sit down.


I’ve heard of DTF years ago when I was in San Diego and have always wanted to check it out. When I found out Jason is a regular there and has eaten 70 of these dumplings in one sitting, I knew I had to go.


We let Jason do the ordering. We ordered pork xiao long bao, crab xiao long bao, shrimp and pork dumplings (not the shiaomai), shrimp fried rice, sauteed green beans, and boiled pork and vegetable dumplings served with red chili oil and minced garlic. The xia long baos and the shrimp and pork dumplings were steamed. We peeked inside the kitchen and saw them making the dumpling wraps. Jason said that they were freshly made and kept thin to avoid overcooking, which is a key technique to maintaining the flavor of the dumplings.


I thought it was really cute how the back of the chopstick wrappers had visual instructions on how to eat a xiao long bao. I’ve laid out the directions for your convenience.


1. Pour vinegar into the small saucer with the slivers of ginger in it.

2. Gently lift one dumpling and dip into the ginger vinegar.
3. Put on spoon.
4. Take a nibble on the dumpling skin and sip the juice.
5. Drizzle some vinegar and ginger slices on top of the dumpling.
6. Now enjoy.


Jason said that the pork dumplings are Shanghainese dumplings. I felt bad for James and Jason, both of whom had to wait to eat each thing until I took adequate pictures. hahaha. Sorry for being such a pain.

The crab dumplings are apparently seasonal in China, so you usually can’t get them all the time. Not sure if that’s the case here in California where there are no seasons. The only way you can tell the dumplings apart is that the crab dumplings have a carrot in the center of the steamer. But taste wise, you can tell as soon as you taste the juice from the dumplings. I was so distracted by all the different items, I can't remember which I liked better.


The shrimp dumplings were really great too. The shrimp dumplings have pork and a plump, juice morsel of shrimp inside.

Here's a peek inside.

We also had boiled pork and vegetable dumplings served with red chili oil and minced garlic.

The dumplings were excellent, but my favorite was the fried rice and green beans. hahaha. I could have just come here and eaten these two things and been perfectly happy. Can't you just see the shiny, individual grains of rice fried with shrimp, egg and scallions. This is not your typical fried rice from Chinese takeout made out of day old rice, it was fluffy and moist. The shrimp is a perfect shade of pink too.


The fried green beans were stellar too. I don’t know how all Chinese restaurants fry their green beans, but they are always cooked to perfection and never overcooked. They had an extensive list on their menu so hopefully I’ll be able to check out their other items next time.

I miss you Din Tai Fung. I'll pay you a visit soon.

Din Tai Fung
1088 S. Baldwin Ave.
Arcadia, CA 91007

Tuesday, October 27, 2009

It Finally Feels Like Fall...

I have so many posts that are in the works, but this past weekend was my grandma's 80th birthday and my mom has been in town, so it's been quite hectic at the soomeenshee household. Not to mention, I'm leaving for NY tomorrow and I'll be helping out at a campaign for a week, so I will probably be MIA for awhile, but I will try to sneak in a few posts here and there.

Don't worry, I plan on blogging about all the food I'll be eating in NY and Spain, so any suggestions on good eateries would be greatly appreciated. A friend recently told me about El Bulli near Barcelona, apparently one of the best restaurants in the world. The restaurant is only open from April to October. They spend the remaining six months on culinary experiments for the following year. I wonder if I can apply to be their guinea pig. That would be amazing. Did I mention they have a 30-course gourmet menu? Drool.

It's been hot as heck these days in LA, but something about seeing pumpkins around makes me feel like it's fall. Here's a couple pictures I took at the flower market a few days ago. Check out the colors, aren't they gorgeous.

Seeing these pumpkins really made me want to carve a pumpkin. I feel like a Toys R Us kid these days, but I've been really wanting to carve a pumpkin like nobody's business. So today, I sort of got my wish. Today was the last day of my flower arranging class and I was so stoked to see that we were using little pumpkins as the base of our centerpieces. We cut off the top, took out the seeds and made a little arrangement out of it. Look at the cute sunflower spider too. Adorable!

I hope you guys are all enjoying the fall season and all that it has to offer.

Friday, October 23, 2009

Nestle Toll House vs. NY Times Chocolate Chip Cookie

Have you seen the recent NY Times article about the cookie diet? It sounds a bit gimmicky to me. I don't know about turning a cookie into a diet product, but I do need to find a diet out there for people who eat too many cookies. You know you have a problem when you are eating chocolate chip cookies and a banana for breakfast.

Thank God I am going to be away from my oven for a month. I think someone might have had to do an cookie intervention if I continued at this rate. I will share with you, however, two recipes for chocolate chip cookies while I am on a cookie detox.

JW, Wonster and I made a batch of these cookies last week during our cookie decorating party.

Nestle Toll House Chocolate Chip Cookies
adapted from Best-Loved Cookies

2 1/4 cups all-purpose flour
1 teaspoon baking soda
1 teaspoon salt
1 cup butter or margarine, softened
3/4 cup granulated sugar
3/4 cup packed brown sugar
1 teaspoon vanilla extract
2 large egg
1 (12 ounce) package NESTLE® TOLL HOUSE® Semi-Sweet Chocolate Morsels

Preheat the oven to 375 F. Combine flour, baking soda and salt in small bowl. Beat butter, granulated sugar, brown sugar and vanilla extract in large mixing bowl until creamy. Add eggs one at a time, beating well after each addition. Gradually beat in flour mixture. Stir in morsels. Drop by rounded tablespoon onto ungreased baking sheets. Bake for 9 to 11 minutes or until golden brown. Cool on baking sheets for 2 minutes. Remove to wire racks to cool completely.

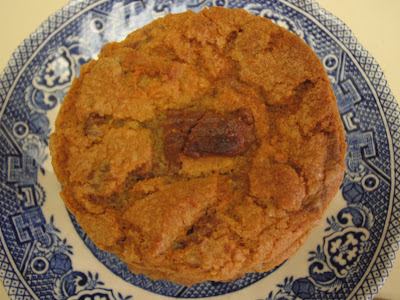
The recipe said that it made 5 dozen cookies, but we ended up with 3 dozen. I'm not sure how we were 2 dozen short. It's not as though our cookies were that big, they seemed regular size to me. As you can see from the picture, they were on the fat side. They didn't really flatten, so the edges were crispy and the center was soft. They were alright, but they didn't blow me out of the water ... as clearly all cookies must, right? =)
I personally think the Thick and Chewy Chocolate Chip Cookies are better. However, the NY Times Chocolate Chip Cookie surpasses them both. It's a bit more time consuming to make, so I would save this recipe for special occasions and rely on the Thick and Chewy Chocolate Chip Cookies for your go-to recipe. I found this recipe last year and, up until that point, could never make a successful batch of chocolate chip cookies at home. I just thought what's the point of making homemade chocolate chip cookies if I can get better results from the premade, refrigerated Nestle Toll House cookies they sell at the market. The NY Times Chocolate Chip Cookie changed all of that for me. It's pretty darn amazing, if I do say so myself. And there is a reason why refrigerated cookie dough yields such good cookies. There's something magical that happens when you leave the dough refrigerated for at least 24 hours.

I recently got a bag of semisweet chocolate chips from Surfas, a really fun restaurant supply and gourmet food store in Culver City. They have a whole aisle devoted to just chocolate. They have bins and bins of chocolate chips, fèves and blocks. I must have spent like 20 minutes trying to figure out what to buy and another 20 minutes justifying my purchase. I've always been satisfied with my $1.99 bag of semisweet chocolate chips from TJ's, but I was curious how much better it could be with superior Belgium chocolate.

The recipe called for semisweet chocolate with at least 60% cocoa content. I couldn't find one with exactly 60% so I settled for a 2 lb bag of Callebaut Extra Bitter Chocolate Disks ($12). Yes, I had major buyer's remorse when I left the store, but it was well worth it after tasting the cookies. I later saw that Ghiradelli sells semisweet chocolate chips with 60% cocoa content for much cheaper, so I might try that next time. Much more friendly on the wallet.

Chocolate Chip Cookies

adapted from NY Times


2 cups minus 2 tablespoons

(8 1/2 ounces) cake flour (see note)

1 2/3 cups (8 1/2 ounces) bread flour

1 1/4 teaspoons baking soda

1 1/2 teaspoons baking powder

1 1/2 teaspoons coarse salt

2 1/2 sticks (1 1/4 cups) unsalted butter

1 1/4 cups (10 ounces) light brown sugar

1 cup plus 2 tablespoons (8 ounces) granulated sugar

2 large eggs

2 teaspoons natural vanilla extract

1 pound bittersweet chocolate disks or fèves, at least 60 percent cacao content

Sea salt.

Note: I didn't have cake flour on hand, so I substituted 1 3/4 cups of all purpose flour and 1/4 cup of cornstarch for 2 cups of cake flour. I put in the all purpose flour and cornstarch in a zip lock bag, shook it like a Polaroid picture and took out my measurements from there. Also, I was able to find bread flour from Whole Foods.

1. Sift flours, baking soda, baking powder and salt into a bowl. Set aside.

2. Using a mixer fitted with paddle attachment, cream butter and sugars together until very light, about 5 minutes. Add eggs, one at a time, mixing well after each addition. Stir in the vanilla. Reduce speed to low, add dry ingredients and mix until just combined, 5 to 10 seconds. Drop chocolate pieces in and incorporate them without breaking them. Press plastic wrap against dough and refrigerate for 24 to 36 hours. Dough may be used in batches, and can be refrigerated for up to 72 hours.

3. When ready to bake, preheat oven to 350 degrees. Line a baking sheet with parchment paper or a nonstick baking mat. Set aside.

4. Scoop six 3 1/2-ounce mounds of dough (the size of generous golf balls) onto baking sheet, making sure to turn horizontally any chocolate pieces that are poking up; it will make for a more attractive cookie. Sprinkle lightly with sea salt and bake until golden brown but still soft, 13 to 15 minutes.

Transfer sheet to a wire rack for 10 minutes, then slip cookies onto another rack to cool a bit more. Repeat with remaining dough, or reserve dough, refrigerated, for baking remaining batches the next day. Eat warm, with a big napkin. It yields about a dozen and a half of cookies.

The verdict: Even after the cookie cooled down, the cookie remained soft and the chocolate melted. Usually when you bite into a cooled cookie with regular chocolate chips, the chocolate by then has cooled and has hardened. It's like eating a really good buttery cookie studded with chocolate chips. The NY Times Chocolate Chip Cookie, however, is a soft, caramel cookie with pockets of warm chocolate layered throughout in each bite. It takes more effort and extreme will power to not bake the cookies right away, but the end result is pretty darn perfect.

Thursday, October 22, 2009

Peanut Butter-Cup Cookies

Looks innocuous enough, right? WRONG ...
This cookie has been plaguing Wonster's and my existence for the past few days. Pete came last week to LA and we baked these cookies for her BF and since then, Wonster has been craving them. I mean ... really CRAVING them ... like sending me multiple emails through the day about how delicious they are and how we have to make them again. This is the girl who has clearly stated that peace offerings cannot be made of sugar or butter and who, given the option between a vienna sausage or a sugar cookie, will pick the vienna sausage. While my eyes glaze over at the sight of cakes and cookies, she only has eyes for salty and savory things. So if a cookie can make a convert out of her, it had to be pretty darn good.

So we asked Pete for the recipe but the blasted recipe card got lost somewhere en route to Tokyo so we were out of luck. JW and I did some searching online for recipes but most of them included peanut butter in the recipe, and I know for sure we didn't use any peanut butter. Through my trusty friend, Google, we found a recipe from Real Simple that used chopped peanut butter cups and not peanut butter. Score! It wasn't Pete's beloved recipe, but I had a huge bag of Reese's Peanut Butter Cups taking up a huge chunk of space in my freezer and Wonster might have cried if we didn't make these, so we gave it a go.

It turned out pretty darn good. I will have to ask for the official recipe from Pete recipe once she gets back in town, but these definitely hit the spot for now. Hope you enjoy these, just as much as we did.

Peanut Butter-Cup Cookies
Real Simple

1 1/2 cups all-purpose flour
1 teaspoon baking soda
1/2 teaspoon kosher salt
1/2 cup (1 stick) unsalted butter, at room temperature
3/4 cup dark brown sugar
1/2 cup granulated sugar
1 large egg
1 teaspoon pure vanilla extract
1 12-ounce package small peanut butter cups

Heat oven to 375° F. Line 2 baking sheets with parchment paper. In a large bowl, whisk together the flour, baking soda and salt.

Coarsely chop the peanut butter cups and set aside.
Using an electric mixer, beat the butter and sugars until creamy. Add the egg and vanilla and beat to combine. Gradually add the flour mixture, mixing until just incorporated.

Fold in the peanut butter cups, reserving about half a cup of the peanut butter cups. Drop tablespoon-size mounds of dough 2 inches apart onto the prepared baking sheets. Sprinkle the remaining peanut butter cups on top of the cookies right before putting them into the oven. The peanut butter cups have a tendency to get mushed up in the batter, but we thought it looked nice to have the peanut butter cups sticking up on each cookie.

Bake until light brown around the edges, 12 to 15 minutes. Transfer to a baking rack to cool. Once cooled, devour immediately.

Wednesday, October 21, 2009

Cookie Decorating Part 2 and Pancit

Wonster, JW and I had another cake decorating party at my place on Wednesday. All the cookies were such a hit last week, we got more requests for them (OK, I'll be honest, the requests were mostly from ourselves, but who's paying attention). So the girls came over and we made gingerbread cookies, peanut butter-cup cookies and the original Nestle Toll House chocolate chip cookies this time.

I wanted to make some cookies to send to my cousin Jung in SF. So here are some cookies we decorated for him.
Look at the cute Halloween cookie my friend made. Sooo cute!

For lunch, Wonster made us a yummy lunch of Filipino fried noodles called Pancit. She brought over all the ingredients and whipped it up in no time.

Wonster's Pancit

Ingredients
1/2 lb peeled shrimp
1 lb sliced pork
1 16-oz pack of pancit bihon noodles
1 cup of chicken broth
1/4th of a cabbage, sliced into strips
1 onion, sliced
couple cloves of garlic, crushed and minced
2 green onions, chopped
1/2 carrot, sliced
2 stems celery, sliced
1.5 tbsp of fish sauce
3 tbsp of soy sauce

Soak the pancit bihon noodles under hot water to soften.

Grease a large pan or wok and saute onions and the pork strips. Then add the garlic until fragrant. Next, add the carrots, celery and cabbage. Drain water from the noodles and add to the pan or wok. Add the chicken broth, soy sauce and fish sauce. Add in the shrimp. Cook until the noodles are soft.

The noodles are thin so they will cook pretty fast and these noodles are meant to break apart, so don't think you've ruined the dish if you start to obliterate the noodles with your super strength. It's supposed to be like that. Once the liquid has been absorbed into the noodles, it is ready to eat. Just don't forget to add the green onions in before serving. Pour on some siracha and dig in.
Thanks Wonster for sharing the recipe with us. This is a shockingly simple recipe that yields a delicious and quick meal. It's healthy too. We used a little bit of oil to grease the pan at first, but that was about it and it's chock full of veggies. It gets the soomeenshee seal of approval. =)

Tuesday, October 20, 2009

Course 2: Pansies, Daffodils, Primroses and a Blue Bird

I can't believe it was already our third class in Course 2. That means next week is our last week, where we'll be putting together all the sugar flowers we made in class thus far unto a cake board. Time sure flies when you're having fun. So continuing with the theme of flowers, we made some pansies. This was the teacher's example. I guess pansies can come in two different colors, with a little loop in the center.
Here's my version. Not bad, eh?
Next we did the petals of a daffodil. Daffodils are yellow, but I only had pink frosting left, so I made pink daffodils. You have to pipe out a petal and then with your hand, pinch up the side so the petals curl up a bit.
Then you create an open coil center that looks like a megaphone. Add a zigzag trim to the top of the coil and you have a daffodil! Don't these totally remind you of those huge flowers in the Alice in Wonderland?
Here's my row of colorful daffodils.
We also made primroses. You basically make five heart shapes and then add a little star center and another small dot on top of it.
Next, we made a blue bird entirely out of frosting. We brought in a batch of color flow icing from home. It's yet another type of icing that cake decorators use to make shiny, pillowy designs. With color flow icing, you first outline the pattern you want to fill in. We copied a bird pattern and outlined the shape in white.
Once the outline hardens, you color and thin out the icing and fill in the empty space inside the white border. The icing kind of flows, hence the name color flow, and fills into the crevices. You then let this completely set and dry.
We also had some leftover time so we made mums again. Remember how much I hated them. They still suck. My teacher said that people can sell these sugar flowers for $5 each. Can you believe it? Heck, I'd charge $10 for this mum. It's that painful to pipe out. Pretty, but painful.

Monday, October 19, 2009

Senor Fish - Eagle Rock, CA

Before our weekly flower arranging class at Ivy's Flower Station, Wonster and I went to Senor Fish for some burritos. Wonster has been talking about their shrimp and scallop burritos for awhile, so I was dying to try it out. Senor Fish is known for their fish tacos and I've had them years ago before I lived in San Diego, and haven't tried it since so I don't know how good they are. I am partial to the fish tacos at South Beach Bar & Grille in San Diego. It's sooo good, but I need a LA replacement.

So off we went to Senor Fish. Here's the colorful sign in front of the building. It's basically a cute craftsman house on a corner that they converted into a restaurant.

They have a whole condiment bar with radishes, limes and a whole slew of salsas. I wanted to take a picture for you all, but you couldn't really see the salsa because the containers were pretty deep. Wonster said the best one was the roasted tomato salsa. I had the roasted tomato salsa and the pico de gallo and they were both very tasty.
Here's the monster burrito.
I couldn't really get a good picture of the shrimp and scallops inside the burritos but it was filled with rice, beans, cabbage, salsa, sour cream and other goodness. The rice and beans were really good. I've been having some really good rice and beans in Eagle Rock lately.
I love the idea of shrimp and scallops in a burrito. I've had shrimp burritos before, but scallops ... oh my, my, it's genius. If I could change anything with this burrito, I would not fry the shrimp and scallops, but grill them instead. I think if it was fried right to order and then put into the burrito, it would be Ah-mazing! The batter didn't have the nice crunch I was expecting, rather it got soggy from all the ingredients in the burrito. I'm sure it's harder to maintain the consistency since it's in a burrito, so maybe I'll try it in a taco next time. Aside from that, the combination of the rice and beans with the shrimp and scallops were really good. It's definitely worth a visit to the Fish if you're in the area. I might have to go back and try this grilled in a burrito or fried in a taco next time, sooner rather than later, of course.

Senor Fish
4803 Eagle Rock Blvd.
Los Angeles, CA 90041


Oh, in other news, I got stung by a bee for the first time in my life. I was sitting outside the flower shop and thought my hair pin was falling out, so tried to grab it and didn't realize there was a bee on my head. So I got stung on the tip of my index finger. Wonster was kind enough to pull out the stinger for me, otherwise it would have been stuck in my finger all night. It definitely stung for a bit and my finger swelled up. Wonster and I just waited to see if I would have some weird allergic reaction and swell up like Violet Beareguarde from Charlie and the Chocolate Factory. Turns out, I'm not allergic. Good to know for future reference. But poor bee, who I accidentally scared and caused to sting me in self-defense. Apparently, the bee dies several hours after stinging because when the bee mortally tears her abdomen when the barbed stinger is left inside the victim, in this case, my finger. Poor thing, if she only knew I was just trying to touch my hair and not attack her. She stung me and killed herself in vain. =(

I did some more research and apparently male bees have no stingers, so it's only the ladies with the stingers. Queen bees, on the other hand, have smooth, curved stingers, which they use only on other queens and they can withdraw their stingers so they won't die. Learned something new today!

Saturday, October 17, 2009

Tiny Chocolate Chip Cookies

When the girls came over and baked cookies, we made a batch of these cookies but for some reason, it came out all funky. It was really runny. The cookies tasted OK, but they were not fat or chewy as the original batch. It might have been the butter. We didn't fully melt it, like the recipe called for, but it was pretty much melted from being out on the counter all morning so we figured it would be fine. I disobeyed the cardinal rule of baking .... always follow directions and measurements to a tee or else get wonky cookies. Thus, I got wonky cookies, but I learned my lesson.

The girls took the cookies home and I mailed the rest to Mary and my cousin. I was going to my aunt's house later this week and I know she loves whenever I bake her cookies, so I wanted to whip up a quick batch of cookies for her as well. I found a recipe in The Gourmet Cookbook for Tiny Chocolate Chip Cookies that referred to them as "exquisite and almost jewel-like." Sounded lovely to me, so I tried it.

Tiny Chocolate Chip Cookies
The Gourmet Cookbook

1 1/4 sticks (10 tablespoons) unsalted butter, softened
2/3 cup packed light brown sugar
3/4 teaspoon salt
1/2 teaspoon baking soda
1 large egg
1/2 teaspoon vanilla extract
1 cup all-purpose flour
1 1/4 cups (7 1/2 ounces) semisweet chocolate chips

Put a rack in middle of oven and preheat oven to 400 F.

Beat together butter, sugar, salt and baking soda in a large bowl with an electric mixer at medium speed until fluffy, about 3 minutes.

It looks like this. Beat in egg and vanilla. Add flour and mix at low speed until just combined. Fold in chocolate chips.

Drop barely rounded 1/2 teaspoons of dough about 1 1/2 inches apart onto ungreased baking sheets.

Bake in batches until golden brown, 6 to 7 minutes per batch. Transfer cookies to racks to cool. So don't these look exquisite and jewel-like?
These cookies are dangerous. They are so tiny so I found myself just popping the ugly ones into my mouth, which amounted to one out of four cookies. hahaha. I probably ate the equivalent of three gigantic cookies without even realizing it.

It takes awhile to scoop out the little balls of dough, but if you're in the mood for something different, this is a nice change from the usual chocolate chip cookies. Just don't yell at me if you end up eating 30 of these in one sitting. =)

Chunju Han-Il Kwan - Los Angeles, CA

I've been eating a lot of jigaes and stews lately. I think it's because of the cold weather we've been having in LA these days. Nothing beats eating something warm and spicy on a cold, rainy day.

Yesterday, my friend James and I met up to hit some golf balls at Aroma. For those that haven't been, it's one of those Korean golf ranges in the heart of Koreatown. They have those automated golf ball dispensers where each ball comes up from the ground once you hit the tee, which is super convenient. Apparently the balls are cheaper on Tuesday and Wednesday, so keep that in mind! Also, you get three hour parking with validation at the golf range.

I think there are about three or four floors for you to hit. The weird thing is that it looks straight into an apartment building. I guess it's more disturbing for the residents to have all these balls flying at you than for us to be hitting them. Anyhow, there were quite a few people out that night even though it was cold and raining. Koreans sure love their golf.

After we were done with golf, we went to Chunju Han-Il Kwan for some budae jigae. It's basically across the street from Chapman Plaza, in the same strip mall as Holly's Coffee. I've never had budae jigae before, but apparently it's a spicy stew with spam and sausages in it. I guess it's kind of like kimchee jigae but with lots of meat? We were going to order the budae jigae but we saw that they had dak doritang (spicy chicken stew) on the menu and it sounded good so we ordered that instead.

Doesn't it look yummy? The chicken was really moist and the sauce, although it looked super spicy because of its bright red color, it was on the mild side. It takes longer to cook, so just beware if you're dying of hunger.

James said it was one of his favorite Korean restaurants in LA. The restaurant was packed when we were there, so I guess a lot of other Koreans share the same opinion. He said his uncle from Korea said Chunju Han-Il Kwan was better than Korean food in Korea. Blasphemy! I almost disowned him as a friend once he said that, but he quickly apologized. hahaha, j/k.

Here's the different side dishes that they gave us. Usually they give you the side dishes before the main dish arrives, so in those circumstances I would have polished off all the side dishes, but they gave it to us at the same time as the dak doritang, so I was too busy eating the stew to try all the side dishes. I had a couple bites here and there of the side dishes and they were good.


They also gave you purple rice and moo gook (beef soup with daikon). The soup was yummy.
After dinner, James wanted to go eat sushi. Apparently it's dineLA Restaurant Week this week and Sugar Fish was participating, so he suggested we get a few pieces to see if it's really like Sushi Nozawa and worthy of the hype, but his friends saved us from being major gluttons. They were also in K-town, so we met up with them for drinks instead. I actually haven't hung out in K-town in a long time, but it was actually a lot of fun. Dare I say, I think LA is actually growing on me again. Wow. I never thought I'd ever utter those words. And of course, I say this now before I leave for my one month jaunt to NY. hahaha. Can't wait!

Aroma Golf Range
3680 Wilshire Boulevard
Los Angeles, CA 90010

Chunju Han-Il Kwan
3450 W 6th St, #106
Los Angeles, CA 90020