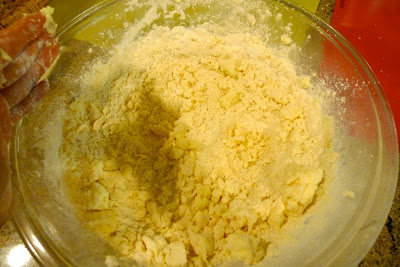
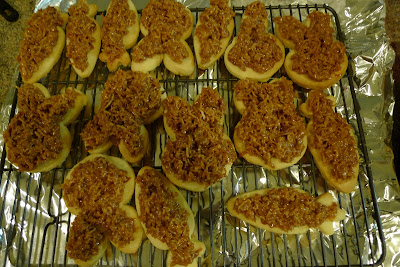
So since I was making a mess in the kitchen with the zucchini tea cake, I decided to make a coffee cake for my friend as well. This was super easy and I happened to have all the recipes on hand.
Showing posts with label chocolate. Show all posts
Wednesday, June 8, 2011
Tuesday, April 26, 2011
Blackbird - Chicago, IL
I've been wanting to go to Blackbird for some time and I noticed that they usually participate in Restaurant Week so I figured I'd try to get a reservation that way. They are one of the first restaurants to completely fill up so you really have to get an early start if you want to try to get reservations there. I haven't been able to get reservations the last few times I tried, so when I heard that they were participating in Chef's Week this year, that was the first reservation I made and I didn't even consult my friends. I just booked it.
Tuesday, April 5, 2011
Mercat a la Planxa - Chicago, IL
I've been a fan of Jose Garces on Iron Chef and especially from his food demonstration at the Chicago Gourmet this past summer. He was very approachable and down to earth. I've been itching to try his Chicago restaurant, Mercat a la Planxa, but for one reason or another, it kept eluding me.
So number two on my list for Restaurant Week was Garces' Mercat. I got a bunch of us together on a Friday night for some tapas. It's a beautiful space right on Michigan Ave near the Art Institute. Here was what was great and not so great about Mercat for Restaurant Week.
The good news: the food is excellent, it's so flavorful and everything we had was delicious
The bad news: you do not get your money's worth if you come in a big group for Restaurant Week. Typically for Restaurant Week, you get a choice of three items as a three course meal, which usually ends up being more than enough food. I thought it was a bit odd that the waiter encouraged us to order additional plates on top of the restaurant week menu. We thought a few additional tapas would be enough, but even with those additions, we totally felt stiffed. We got some items taken off the final bill, but it didn't leave us with a good impression.
Because everything is served family style, the portions weren't adequately thought out. We were often times presented with one dish to share among the six of us, even though we were each paying a prix fixe price. Tables of two next to us were getting the same exact dish that we were, except they were only sharing amongst the two of them.
I do think it's worth it if you come in pairs. If you do decide to come with a bigger group, you're better off ordering off the regular menu instead of doing the set menu.
So number two on my list for Restaurant Week was Garces' Mercat. I got a bunch of us together on a Friday night for some tapas. It's a beautiful space right on Michigan Ave near the Art Institute. Here was what was great and not so great about Mercat for Restaurant Week.
The good news: the food is excellent, it's so flavorful and everything we had was delicious
The bad news: you do not get your money's worth if you come in a big group for Restaurant Week. Typically for Restaurant Week, you get a choice of three items as a three course meal, which usually ends up being more than enough food. I thought it was a bit odd that the waiter encouraged us to order additional plates on top of the restaurant week menu. We thought a few additional tapas would be enough, but even with those additions, we totally felt stiffed. We got some items taken off the final bill, but it didn't leave us with a good impression.
Because everything is served family style, the portions weren't adequately thought out. We were often times presented with one dish to share among the six of us, even though we were each paying a prix fixe price. Tables of two next to us were getting the same exact dish that we were, except they were only sharing amongst the two of them.
I do think it's worth it if you come in pairs. If you do decide to come with a bigger group, you're better off ordering off the regular menu instead of doing the set menu.
Our waiter highly recommended the bacon wrapped dates stuffed with almonds. Each order comes with 2 skewers so for the five of us, we ordered 2.5 orders. These were amazing. If you've never had bacon wrapped dates before, you need to get on it.
Wednesday, March 30, 2011
David Burke's Primehouse - Chicago, IL
David Burke is known for his whimsical interpretation of American classics. So when I saw that David Burke's Primehouse was participating in Chicago's Restaurant Week last month, I had to get a group of us together. Yeena, her husband Dave, Susan and I went there for lunch. It was an awesome deal. We each got a choice of appetizer, entree and dessert for $22.
Monday, March 28, 2011
Cocoa Brownies with Browned Butter and Walnuts
Last month, the cover page of my bon appetit magazine read "Best-Ever Brownies. Waring: You Will Eat the Entire Tray." Last year, I found my go to brownie recipe and thought my search was over. But that didn't mean I couldn't take a peek at the recipe, right? So when I read the recipe, it reassured me to know that it sounded remarkably similar to David Lebovitz's recipe. Especially the part about mixing the batter for a full minute or until you get a nice sheen. I have to admit though I was mildly curious about the browned butter part so I had to see for myself.
Tuesday, March 15, 2011
Mastro's Steakhouse - Chicago, IL
For Susan's official birthday dinner, a week later, we went to Mastro's Steakhouse. Those from California are familiar with Mastro's but they opened one here in Chicago a few months ago in River North and it's been doing really well.
It was a packed night and really dim in there, so I didn't want to bust out my camera and annoy the parties next to us. I didn't take pictures until dessert, well after the place had cleared out. Sorry guys, I'll share with you what we ordered though.
We got the Mastro's house salad, warm spinach salad and the chopped salad to start. All of them were great. Usually I end up gravitating towards one salad, but I have to say all of them were addicting. For our entrees, most of us ordered the steak, but I think Gook ordered the pork chop and he said it was excellent as well.
I love coming with a big group to steakhouses because you get to order and try so many different sides. For our sides, we got their lobster mashed potatoes, brussels sprouts with pancetta, creamed corn, asparagus and sauteed mushrooms.
Now for the desserts. We ordered the butter cake, chocolate pudding cake and they surprised Susan with a slice of their chocolate cake.
Here's the chocolate pudding cake with creme anglaise. It was gooey and warm.
This is one huge slice of chocolaty cake for Susan.
They are famous for their butter cake, which is like pound cake topped with vanilla ice cream, drizzled with caramel and raspberry sauce. It also comes with a bowl of fresh whipped cream. Talk about decadent. People seemed to like the butter cake and the pudding cake the best. The chocolate cake was a bit too dense.
We all probably gained 10 pounds from this meal alone, but that's what friends are for, right? :)
Why do I feel like I need to go on a juice cleanse all of the sudden?
Mastro's Steakhouse
520 N Dearborn St
Chicago, IL 60654
Labels:
Chicago,
chocolate,
restaurants,
steak
Sunday, January 16, 2011
Nutella and Rosemary Marshmallow Squares
Dessert #2 on the menu was Nutella and Rosemary Marshmallow Squares.
I was inspired by an article I read in the LA Times about how a writer accidentally discovered how some basic, homey desserts such as chocolate chip cookies, brownies and shortbread could be transformed with some unexpected ingredients such as herbs and spices. One that particularly caught my attention was Rosemary Marshmallow Squares. I use a lot of rosemary in savory meat dishes, but never in baked goods. I'm not sure why but rosemary and marshmallows, although an unlikely pair, in theory seemed like it could work.
I thought serving rice crispy treats might be a little boring, so I decided to tweak a similar recipe for Peanut Butter Crispy Bars from Baked. I substituted peanut butter for nutella and made one layer of chocolate on top. Some of my friends were taken aback by the strong rosemary flavor, but I loved it. For me, I thought the piney flavor melded really well with the sweet, buttery rice crispy square and the hazelnut chocolate topping added another level of intrigue to it.
Dulce de Leche Brownie
Happy Belated New Year! What better way to start my blog in 2011 with a post on dulce de leche brownies. I made these for a housewarming I had a few months ago. I went a little nuts and made four types of desserts. Why? Because I wanted a little something for everyone. Not every one likes brownies or cupcakes, or so I thought. :)
Tuesday, November 16, 2010
Robert's Absolute Best Brownies
I have a weakness for brownies: fudgy, chewy brownies to be precise. I've tried making brownies from scratch before, but often times they end up worst than those boxed brownie mixes. I was about to throw my hands up in surrender and stock emergency boxes of Ghiradelli brownie mixes, until I saw this post on Leite's Culinaria's blog for these brownies. This recipe is from David Lebovitz's book, Ready for Dessert. Apparently the late Robert Steinberg, who cofounded Scharffen Berger chocolate, created this recipe. You have to believe the founder of Scharffen Berger chocolate must have a good brownie recipe or two.
I have to admit, I didn't even use good quality chocolate in my batch, I used a standard bag of semisweet chocolate chips and these were divine and surprisingly simple to make. Not to mention, you'll get a good arm workout as well (you will soon see why).
Friday, November 12, 2010
Gastro-Wagon - Chicago, IL
In cities like LA and NYC, food trucks are all the rage, but in Chicago, there's a law prohibiting food trucks to cook on the road. Trucks are only permitted to sell prepackaged foods. The city is considering legislation to change all of this, but for now, some food trucks like Gastro-Wagon or various cupcake perveyors have been driving around town selling their premade goodies to the hungry masses.
I've heard about Gastro-Wagon but wasn't really motivated to chase them down, but one of my coworkers alerted me to their ascendance in the Loop for lunch one day so we decided to check it out. We headed out around 12:15 and there was already a long line of people waiting. Because all of the sandwiches, soups and desserts are already prepared and packaged, the line moves pretty fast.
Labels:
Chicago,
chocolate,
restaurants,
sandwich,
soup
Sunday, October 24, 2010
Nutella, Peanut Butter and Banana Stuffed French Toast
I was rummaging through my fridge and cupboard trying to come up with something to make for breakfast one weekend and vaguely remembered an episode on the Food Network for Peanut Butter and Banana Stuffed French Toast from Cafe 222 in San Diego. When I lived in San Diego, we would walk by Cafe 222 all the time but I never ate there before. Apparently Bobby Flay loves their french toast so I thought I'd give it a shot.
I happened to have some Nutella in the cupboard so I was curious how Nutella would go with Peanut Butter and Bananas. I ended up doing a sampling of all three flavor combinations and made three different types of french toast: one with just Nutella and bananas, another one with peanut butter and bananas and the last one with all three.
Sunday, October 17, 2010
Banana Espresso Chocolate Chip Bread
I don't know about you, but my bananas often ripen faster than I can consume them. One trick that I've learned is to toss ripe bananas (unpeeled) as is, into your freezer. A frozen banana looks like the one to the right.
I've discovered that frozen bananas are great in smoothies or in this banana bread. My roommate introduced me to this recipe and it's the bomb diggity, as my cousin Jung would say. When you are ready to use these bananas for the bread, you don't need to defrost them for that long. Just take them out for a few minutes before using, wait till it gets a little soft, run your knife down one of the sides and peel it off. My roommate recently peeled it using the vegetable peeler and she said it worked great too. Toss the semi-frozen banana into a bowl, mush it up with your fork and you have ripe bananas ready for your recipe. I like freezing it in the peel because the fruit itself seems to retain a nice yellow color and it's so much easier to toss the whole thing into the freezer without having to wrap it in saran wrap. Now for the recipe!
Tuesday, September 28, 2010
Van Leeuwen Artisan Ice Cream - New York, NY
So what does Soomeenshee do after eating a huge meal at Lure Fishbar? Go eat ice cream of course! Yes, her stomach knows no bounds. It so happened to be parked in SoHo and we were going to walk around and burn some extra calories, but I got sidetracked by the Van Leeuwen ice cream truck.


Thursday, July 22, 2010
Chocolate Cupcakes with Swiss Meringue Buttercream
My friend Winston makes the cutest cupcakes ever so I asked her for some cupcake recipes. She sent me this recipe for her chocolate cupcakes.
Winston's Chocolate Cupcakes
Ingredients
2 1/4 cups all-purpose flour
1 2/3 cups sugar
3/4 cup butter or margarine, room temperature
2/3 cup unsweetened baking cocoa
1 1/4 cups water
1 1/4 teaspoons baking soda
1 teaspoon salt
1/4 teaspoon baking powder
1 teaspoon vanilla
2 eggs
Heat oven to 350 F. Place paper baking cups in each of 24 regular size muffin cups. In large bowl, beat sugar and butter with an electric mixer on low speed. In a separate bowl, combine the dry ingredients. Add the eggs vanilla and water to the butter and sugar mixture and beat on low speed, scraping the bowl. Add in the dry ingredients and beat for 3 minutes, scraping bowl constantly. Divide batter evenly among muffin cups.

Bake 20 to 25 minutes or until toothpick inserted in center comes out clean. Cool 10 minutes; remove from pan to cooling rack. Cool completely, about 30 minutes.

This resulted in a lot of cupcakes, which I decided to freeze. I covered each one in sara wrap, then foil and then put it in a zip lock bag. Whenever you need a couple cupcakes, just unwrap the cupcakes and defrost at room temperature and they are as good as new.
For the frosting, I opted for a Swiss Meringue Buttercream frosting. I got the recipe from Martha Stewart.
Swiss Meringue Buttercream
Martha Stewart’s Cupcakes
5 large egg whites
1 cup plus 2 T sugar
pinch of salt
1 pound (4 sticks) unsalted butter, cut into tablespoons, room temperature
1 1/2 teaspoons pure vanilla extract
Combine egg whites, sugar and salt in the heatproof bowl of a standing mixer set over a pan of simmering water. Whisk constantly by hand until mixture is warm to the touch and sugar has dissolved (the mixture should feel completely smooth when rubbed between your fingertips). Attach the bowl to the mixer fitted with the whisk attachment.
Starting on low and gradually increasing to medium-high speed, whisk until stiff (but not dry) peaks form.

Continue mixing until the mixture is fluffy and glossy, and completely cool (test by touching the bottom of the bowl), about 10 minutes.

With mixer on medium-low speed, add the butter a few tablespoons at a time, mixing well after each addition. Once all of the butter has been added, whisk in vanilla. Switch to the paddle attachment, and continue beating on low speed until all air bubbles are eliminated, about 2 minutes.

Scrape down sides of bowl with a flexible spatula, and continue beating until the frosting is completely smooth.
Here are the frosted cupcakes. What I love about this cupcake is that it's not too sweet. It feels like you are eating a chocolate whoopie pie or a ho-ho's.
If you want to save some of the buttercream for future use, transfer it to an airtight container and freeze it for up to 1 month. Before using, bring to room temperature and beat with paddle attachment on low speed until smooth again, about 5 minutes. Trust me it will look like a hot mess when it defrosts and the liquid and solids separate, but beat it enough and it will look like frosting again. =)
Wednesday, June 23, 2010
Molly's Cupcakes - Chicago, IL (Lincoln Park)
A few weeks ago, I had lunch plans at Sultan's Market in Lincoln Park to eat falafel sandwiches. I was an hour early so I was going to walk around the neighborhood and explore. It started raining so I decided to take cover and get some tea. Lucky for me there was Molly's Cupcakes nearby.

Here's a card that describes how Molly's Cupcakes came to be. Cute story. I like how Johnny calls himself the Chief Egg Cracker.

They have an array of cupcakes where you can pick the type of cake (chocolate, vanilla, carrot and red velvet) and then pick the type of frosting (vanilla, chocolate, cream cheese, brown butter and french buttercream). You can also add toppings such as m&m's, reese's pieces, brownies, etc. Their specialty cupcakes however are their center filled cupcakes. The ones that caught my eye were Peanut Butter Nutella with peanut butter cake, nutella filling and buttercream nutella frosting and their Strawberry Shortcake with vanilla cake, whole fresh strawberries cooked in brown sugar filling and vanilla buttercream. I couldn't narrow it down, so I had to ask for advice. I asked which cupcake was their most popular and they told me the Ron Bennington. Let me introduce you to Ron.
He's made of chocolate cake, peanut butter filling, chocolate ganache and crushed butterscotch topping. Holy moly, this cake was good. The cake was super moist and that peanut butter filling was lusciously smooth. This cupcake was definitely worth the $3.50 or however much it was.

I think I need to do cupcakes before lunch more often. Sultan's was quite yummy btw, I just forgot to take pictures.
Tuesday, June 15, 2010
XOCO - Chicago, IL (revisited)
Soup Cook and I were looking for a place to grab dinner after work and we literally stumbled upon XOCO while wandering around River North. I always forget that this place is so close. Lucky for us, we were early for dinner so there wasn't the usual line out the door.
I haven't been back since January and I was so excited to try some different things on their menu. To start, I got some of their guacamole & chips. My roommate recently got me guacamole and chips from Big Star and I have to say, Big Star's was slightly better, but no complaints with Rick Bayless's guac.

Do I get a torta or a caldo? Decisions, decisions ... I opted for their Carnitas Caldos, which is a soup with slow-cooked pork carnitas, potato-masa dumplings, chayote, roasted serrano chile, spinach, arugula and avocado. Yum, yum, yum. I always think a soup is not going to be filling enough, but this is like eating a huge bowl of pho minus all the noodles. The chunks of tender pork and veggies make this very filling. The potato-masa dumplings added an element of starchiness to the dish as well.

Now for my favorite part, their desserts. I wanted to order dessert after we were done because I had my heart set on trying their soft serve ice cream, but by the time we were done with dinner, the line was out the door again. So we waited and waited hoping that it would die down and realized, that there was no way around it, we'd have to stand in line again. Thank goodness the hostess recognized me and told me I could just go up to the register because the line is usually due to people waiting for seats to free up. So if you want to order to go or order dessert, you can just go up to the counter. Good to know for next time!
So here's a pic of the homemade Mexican vanilla soft serve with maple-pecan-bacon-streusel & salted caramel sauce. Yes, you read that right, bacon-streusel. I've been seeing a lot of bacon in desserts lately and XOCO was no exception. I liken this to a grown up version of McDonald's caramel sundaes. The soft serve had amazing flavor, the pecans and bacon added great texture and crunch and let's face it, salted caramel can do no wrong.
Monday, April 12, 2010
Christina Tosi's Compost Cookies
Chef David Chang of Momofuku is opening a restaurant/pig farm in Chicago this fall and I can hardly wait. I have to warn you though, the concept is a bit weird. The new restaurant, called Momofuku Pig Pen, is going to be in a 20,000 sq. ft. warehouse in Pilsen where the pigs will be raised and slaughtered on-site. It will also have little Mangalitsa pigs in the middle of the dinning room so you can feed and pet them. Don't worry, hand sanitizer and buckets of raw corn will be on every table.
I'd love to be able to eat his bao buns in Chicago, but I'm not sure I want to play with the piggies first. Let's hope the Pig Pen offers some vegetarian options and some of Momofuku's signature desserts as well.
I've never been to his Milk Bar in NY, but I've heard of some unique creations by their pastry chef Christina Tosi and have been dying to get my hands on some of her recipes. I think a cookbook is slated to come out next year, but some recipes have cropped up here and there online. Some of her famous desserts are crack pie, blueberry cream cookie, cereal milk soft serve and the compost cookie. I found the recipes online for the crack pie and blueberry cream cookie, but I'm waiting to make a crack pie for a special occasion and the blueberry cream cookie is a bit too much effort. I've been looking for the compost cookie recipe for awhile and although there have been pretty good guesses, there hasn't been an official recipe available until now. Thanks to the Amateur Gourmet for the find.
Now for the cookies ... before you start, I have a few suggestions: (1) Use a silpat or get some parchment paper if you can. I didn't have any, so I used aluminum foil and especially if you add chocolate candies with caramel in them, the cookies will run and will stick. I made a lot of cookie donuts this way. (2) An ice cream scooper with a lever, if you have it, will come in very handy because the dough is very soft and sticky.
Compost Cookies
adapted from Christina Tosi
1 cup butter
1 cup sugar
3/4 cup light brown sugar
1 tbsp corn syrup
1 tsp vanilla extract
2 large eggs
1 3/4 cups all purpose flour
2 tsp baking powder
1 tsp baking soda
2 tsp kosher salt
1 1/2 cups of your favorite baking ingredients (I used chocolate chips, milk duds, rice crispies and some steel cut oats)
1 1/2 cups of your favorite snack foods (I used chips and pretzels)
Note: Christina Tosi uses chocolate chips, butterscotch chips, pretzels, coffee grounds, graham crumbs and oats in her cookies.
In a stand mixer with the paddle attachment, cream butter, sugars and corn syrup on medium high for 2-3 minutes until fluffy and pale yellow in color. Scrape down the sides of the mixing bowl with a spatula.

On a lower speed, add eggs and vanilla to incorporate. Increase mixing speed to medium-high and start a timer for 10 minutes. During this time the sugar granules will fully dissolve, the mixture will become an almost pale white color and your creamed mixture will double in size.

When time is up, on a lower speed, add the flour, baking powder, baking soda, and salt. Mix 45-60 sec just until your dough comes together and all remnants of dry ingredients have incorporated. Do not walk away from your mixer during this time or you will risk over mixing the dough. Scrape down the sides of the mixing bowl with a spatula.
My baking ingredients were milk duds, white and milk chocolate swirled chips, rice crispies. I cut the milk duds in half. I felt a it was a bit of a sugar overload, so I also added some instant steel cut oatmeal from my cupboard for added texture.

Here's my hodgepodge of baking ingredients. On same low speed, add in your favorite baking ingredients and mix for 30-45 sec until they evenly mix into the dough.

For my favorite snack foods, I added pretzels and potato chips. I just crushed these with my hand.

Add in your favorite snack foods last, paddling again on low speed until they are just incorporated.

Using a 6oz ice cream scoop, portion cookie dough onto a parchment lined sheet pan. I later realized that these cookies expand and become quite large, so I switched to a smaller ice cream scoop to make smaller cookies, so the choice is up to you (although see my comments below).
Wrap scooped cookie dough tightly with plastic wrap and refrigerate for a minimum of 1 hour or up to 1 week. The dough is quite soft so it needs to firm up before baking.

DO NOT BAKE your cookies from room temperature or they will not hold their shape.
Heat the conventional oven to 400F. (350F in a convection oven)
When the oven reads 400F, arrange your chilled cookie dough balls on a parchment or silpat-lined sheet pan a minimum of 4" apart in any direction. I have a confession to make. I got lazy and instead of chilling the dough in the ball form, I just chilled the dough in a bowl and scooped it out right before baking. As annoying as this process is, because you have to put several cookies sheets into your fridge, it's worth the extra effort because it makes for a puffier and prettier cookie.
Bake the cookies for 9-11 minutes. While in the oven, the cookies will puff, crackle and spread.
At 9 minutes, the cookies should be browned on the edges and just beginning to brown towards the center. Leave the cookies in the oven for the additional minutes if these colors don't match up and your cookies stills seem pale and doughy on the surface.
Here are the cookies, but like I said, the milk duds melted and spread and made for not very pretty cookies.

Cool the cookies completely on the sheet pan before transferring to a plate or an airtight container or tin for storage. At room temp, cookies will keep fresh 5 days. In the freezer, cookies will keep fresh 1 month.
Here's a picture of the cookie up close. Do you see pieces of pretzel in there?
Here's a picture of the original cookie using the large ice cream scoop vs. the smaller one. The texture is more apparent in the larger one and looks yummier. Do you also see how the smaller cookie is flatter, it's because I didn't chill it in its ball shape. I just chilled the dough in a bowl when I made the smaller cookies. Maybe all these little details are why this cookie is so famous, because it takes a lot of care and effort ... and refrigerator space.

So what's the verdict you ask? This cookie reminds me a lot of the NY Times cookie in how you have to beat the sugar and butter for a long time, refrigerate the dough and also the added saltiness. I think if you love the whole salty vs. sweet combo, you will love it. I feel like it's a mix of a chocolate chip cookie with chocolate covered pretzels rolled into one. I could barely taste the potato chips, but the crunch and saltiness of the pretzels in this was great. Next time I'd just stick with the pretzels only since you don't even get to taste the chips. Why consume extra calories if you can't even taste it. haha.

These cookies are highly addictive. I had one for breakfast today, along with leftover pancakes, and I wasn't hungry at all till way past lunch. Glorious pancake recipe coming up next!!!
Tuesday, March 30, 2010
Peanut Butter Crispy Bars
My roommate made these great grown-up version of Rice Krispy Treats this weekend. Since I've been slacking on the cooking and baking end (the frozen aisle of TJ's is my best friend these days and, according to Susan, is the first place you should look should I ever go missing), I'll share with you the recipe for these yummy bars that my roommate made.
She has this great book from a bakery in New York, called Baked. I was flipping through the book and the desserts in there looked amazing. I'm eyeing a brownie recipe that I might have to try one of these days. But for now, here are some Peanut Butter Crispy bars to tide you over.
These rice crispies are layered with a generous amount of peanut butter milk chocolate and then topped with a dark chocolate icing. My roommate calls these fatty bars, because they are really rich and chocolaty. Just a small bar is enough to satisfy any chocolate, peanut butter cravings you might be having. This apparently is kept refrigerated at the Baked bakery, so it's best served cold.

Baked
For the crispy crust:
1 3/4 cups crisped rice cereal
1/4 cup sugar
3 tablespoons light corn syrup
3 tablespoons unsalted butter, melted
For the milk chocolate peanut butter layer:
5 ounces good-quality milk chocolate, coarsely chopped
1 cup creamy peanut butter
For the chocolate icing:
3 ounces dark chocolate (60 to 72% cacao), coarsely chopped
1/2 teaspoon light corn syrup
4 tablespoons (1/2 stick) unsalted butter
Make the crispy crust
Lightly spray a paper towel with nonstick cooking spray and use it to rub the bottom and sides of an 8-inch square baking pan.
Put the cereal in a large bowl and set aside. Pour 1/4 cup water into a small saucepan. Gently add the sugar and corn syrup (do not let any sugar or syrup get on the sides of the pan) and use a small wooden spoon to stir the mixture until just combined. Put a candy thermometer in the saucepan. Cook over medium-high heat and bring to a boil; cook until the mixture reaches the soft ball stage, 235 degrees F.
Remove from the heat, stir in the butter, and pour the mixture over the cereal. Working quickly, stir until the cereal is thoroughly coated, then pour it into the prepared pan. Using your hands, press the mixture into the bottom of the pan (do not press up the sides). Let the crust cool to room temperature while you make the next layer.
Make the milk chocolate peanut butter layer
In a large nonreactive metal bowl, stir together the chocolate and the peanut butter. Set the bowl over a saucepan of simmering water and cook, stirring with a rubber spatula, until the mixture is smooth. Remove the bowl from the pan and stir for about 30 seconds to cool lightly. Pour the mixture over the cooled crust. Put the pan in the refrigerator for 1 hour, or until the top layer hardens.
Make the chocolate icing
In a large nonreactive metal bowl, combine the chocolate, corn syrup, and butter. Set the bowl over a saucepan of simmering water and cook, stirring with a rubber spatula, until the mixture is completely smooth. Remove the bowl from the pan and stir for 30 seconds to cool slightly. Pour the mixture over the chilled milk chocolate peanut butter layer and spread into an even layer. Put the pan in the refrigerator for 1 hour or until the topping hardens.
Cut into 9 squares and serve. The bars can be stored in the refrigerator, covered tightly, for up to 4 days.

Saturday, March 13, 2010
Shortbread Cookies
My aunt said the reason why she loves the Samoas cookie so much is that they are composed of her two favorite cookies: shortbread and coconut macaroons. So since we were making the Samoas and Coconut Macaroons, I figured we might as well do separate shortbread cookies too. My philosophy is you're going to make a mess in the kitchen when baking anyway, so might as well bake as much as you can in one sitting.
Shortbread Cookies
adapted from Ina Garten
Ingredients
3/4 pound unsalted butter, at room temperature
1 cup sugar, plus extra for sprinkling
1 teaspoon pure vanilla extract
3 1/2 cups all-purpose flour
1/4 teaspoon salt
6 to 7 ounces very good semisweet chocolate, finely chopped (optional)
Preheat the oven to 350 degrees F. In the bowl of an electric mixer fitted with a paddle attachment, mix together the butter and 1 cup of sugar until they are just combined. Add the vanilla. In a medium bowl, sift together the flour and salt, then add them to the butter-and-sugar mixture. Mix on low speed until the dough starts to come together.
I will warn you, our batch came out really crumbly.
We had left the butter out but it's quite chilly these days so it didn't quite soften as we would have liked, so I just ended up using my hands to soften and warm it up. In the end, the dough came together and we ended up forming three small disks of dough. Wrap the dough in plastic and chill for at least 30 minutes.
When you're ready to take it out of the fridge, start flattening out the dough with the plastic wrap still on it. The dough starts to break apart if you unwrap it and roll it out. We flattened it to about an inch thick and started cutting it into 1/2 inch slices. We then cut them in half to make little finger shaped dough pieces.
Place the cookies on an ungreased baking sheet and sprinkle with sugar. Bake for 20 to 25 minutes, until the edges begin to brown. Allow to cool to room temperature.
When the cookies are cool, place them on a baking sheet lined with parchment paper. We used the leftover chocolate from the Samoas cookies to dip some of the shortbread cookies.

Here is a plate of the cookies we made that night for my aunt and uncle, who stayed up past midnight to eat these cookies. Talk about dedication.
Friday, March 12, 2010
Homemade Girl Scout Samoas Cookies
I made these cookies twice. I first tried making bars out of them with my girlfriends and the second time around, I ended up making individual cookies. The shortbread base is a bit crumbly once it's been baked, so it's hard to cut through them cleanly. So my suggestion is to cut out shapes or at least cut them into bars before baking.
I think if you are trying to make them look exactly like the Samoas cookies, they are going to take some more time, but if you're willing to have fun and play around with it, it will turn out really cute and will be just as tasty. The second time for me was way easier than the first. I've made some adaptations, which I hope will make your first time way easier too. So roll up your sleeves and get baking peeps. You no longer have to wait a year to eat these cookies.
Homemade Samoas (a.k.a. Caramel de-Lites) Cookies
adapted from www.bakingbites.com
Ingredients
Shortbread Base
1 cup butter, soft
1/2 cup sugar
2 cups all purpose flour
1/4 tsp baking powder
1/2 tsp salt
1/2 tsp vanilla extract
up to 2 tbsp milk (optional)
Preheat oven to 350 degrees F. In a large mixing bowl, cream together butter and sugar. Mix in flour, baking powder and salt at a low speed, followed by the vanilla and milk, adding in the milk as needed to make the dough come together without being sticky (I didn't end up adding the milk and it was fine). The dough should come together into a soft, not-too-sticky ball. Add in a bit of extra flour if your dough is very sticky.
Roll the dough (working in two or three batches) to about 1/4-inch thickness (or slightly less) and use cookie cutters to make rounds, bars or shapes.
I asked Jung if he had any round cookie cutters at home and he rummaged through one of his drawers and come up with a bunny and carrot-shaped cookie cutter. These were too adorable not to use, so we decided to make bunny and carrot samoas cookies instead. Very fitting for spring, right?
Place the cookies on a parchment lined or greased baking sheet. Bake cookies for 10-12 minutes, until bottoms are lightly browned and cookies are set.
Cool for a few minutes on the baking sheet then transfer to a wire rack to cool completely.
I particularly liked this one. Jung used the leftover dough to make a nose. Too bad it would get covered with caramel and coconuts.
Caramel/Coconut Topping
2 to 3 cups shredded coconut (sweetened or unsweetened)
12 to 16-oz good-quality chewy caramels
1/4 tsp salt
3 tbsp milk or water
8 oz. dark or semisweet chocolate chips
Preheat oven to 300. Spread coconut evenly on a baking sheet (preferably one with sides) and toast 20 minutes, stirring every 5 minutes, until coconut is golden. Cool on baking sheet, stirring occasionally. Set aside.
Jung had a scale on hand so we measured out 12 ounces of caramels. I used about 14 ounces of caramel this time around because the first time I made this, it wasn't sticky enough and wouldn't really hold on to the cookie.
Unwrap the caramels and place in a large microwave-safe bowl with milk or water and salt. Cook on high for 3-4 minutes, stopping to stir a few times to help the caramel melt. When smooth, fold in toasted coconut with a spatula.
It should look like this once you're done. The original recipe called for 3 cups, but again I thought the first time there was too much coconut and not enough caramel, so I omitted a cup of coconut. If you want more coconut, just beware that you will need to add more caramel or else it'll be too dense and won't be sticky enough. If it starts to harden to quickly, reheat the caramel in the microwave for a few seconds.
Using the spatula or a small offset spatula, spread the topping on cooled cookies, using about 2-3 tsp per cookie. Our cookies were bigger so I used a lot more topping, but it ended up covering the cookies perfectly. Reheat caramel for a few seconds in the microwave if it gets too firm to work with.
Jung also suggested we add a layer of caramel in between the cookie and coconut topping to act as the glue, so we peeled about 7 more caramel pieces separately, melted them in a bowl and put a thin layer of caramel in between the cookie and topping and it worked beautifully. Try it out and if your layer sticks without this extra caramel, then this step is not necessary. I left the edges in tact with these cookies because I wanted you to be able to see the shape, but if you are making round ones, just cover the cookie entirely.
While topping sets up, melt chocolate in a small bowl. Heat on high in the microwave in 45 second intervals, stirring thoroughly to prevent scorching. Dip the base of each cookie into the chocolate and place on a clean piece of parchment paper or a flexible, hard surface, like this plastic sheet.
Drizzle the cookies with the remaining chocolate (or melt a bit of additional chocolate, if necessary).
I'll let you in on a little secret. We used a disposable syringe (my uncle's a doctor), filled it with chocolate and drizzled the chocolate that way. But since not many people have disposable syringes on hand (I'd be concerned if you did), transfer the chocolate into a piping bag or a ziplock bag with the corner snipped off and drizzle finished cookies with chocolate. Or if you're lazy like me, just drizzle it with a fork. It'll look more like a Jackson Pollock painting, but it'll still be tasty.
Let the chocolate set completely before storing in an airtight container. The cookies will only peel off cleanly if the chocolate has completely hardened. We put the cookies in the freezer for a few minutes to hasten up the process. These are monster cookies. They are pretty big and thick; they almost look like rice crispy treats. I didn't get to taste them because it was way too late and then I had a plane to catch the next day, but the word at my cousin's is that they are de-lite-ful. =)
Subscribe to:
Posts (Atom)